
Bursting with fall flavors, Pumpkin Pie is my absolute favorite pie and the highlight of the Thanksgiving meal. Smooth, creamy, warming, and generously spiced, this will truly be your family’s go-to for your Thanksgiving table.
Pumpkin Pie Traditions
Like I said, pumpkin pie is my favorite pie. Unfortunately, we only have it a few times in the fall months. This year, I couldn’t wait for Thanksgiving. I made our first one the night we decorated our Jack-o-lanterns and roasted pumpkin seeds. Check out my Instagram Reel on the pumpkins the kids carved while I baked all day.
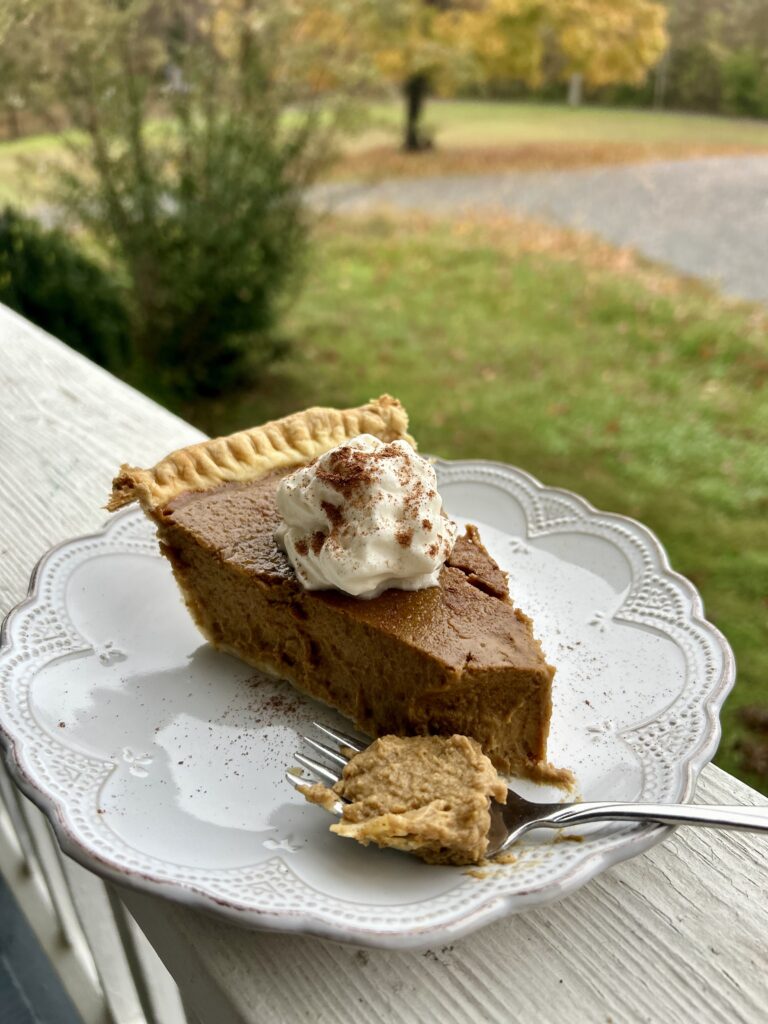
Mainly, it is the highlight of the Thanksgiving meal, served with a dollop of maple whipped cream and dusted with some extra pumpkin pie spice. After all the dishes are cleaned up from the Thanksgiving meal, a transition occurs. We all gather in the living room to watch the first Christmas movie of the season, pie in hand. Pumpkin pie and The Polar Express are the gateway to the Christmas season. It is a dessert worthy of a tradition. Like eggnog and White Christmas, or Peppermint ice cream and The Grinch. Favorite recipes are more likely to be passed down when they are associated with a favorite memory.
Let’s Be Honest
My friend emplored me, “You must master this…you must.” I was not going to let pie crust get the best of me. Humbly, I confess, I avoided a pie post like the plague because I couldn’t get consistent results. Additionally, there were numerous steps, and who am I to teach anyone how to make a pie? Then I realized I didn’t have to. My heart is to create the extraordinary in the midst of the ordinary and to season life with JOY, not master the perfect pie. There are numerous videos out there to help you master the basics. I want you to enJOY life by creating celebrations wherever you can. My pumpkin pie is the BEST, most flavorful pumpkin pie…it’s just not that pretty, yet. But I will keep practicing.
Truthfully, I have tried every crust recipe from everyone I met who had a beautiful pie. It was me. What was I doing wrong? Then it hit me. What was the goal? To have the most beautiful pie or enJOY the whole process, even if it wasn’t going to score a blue ribbon at a beauty pageant? A pie can be beautiful, but what you really remember is how it tastes. So, my pies may not win awards for the most beautiful, but they will keep you coming back for more. Who knows, you may have the knack for nailing the perfect crust. I bless you. Send me pictures. The recipe for this crust and filling is stellar; I am okay with inconsistent crust results as long as I am humming with a fork in hand when dessert is called.
Step-By-Step Process
The Crust
Let’s start with the crust. As you can see from the pictures below, over the years, I have played with the crust design, but the recipe remains the same. Ultimately, I blame the inconsistency of my crust results on my warm hands. The key to a good crust is keeping it cold. In fact, I have even heard it said that for pie crusts, the refrigerator is just as important as the oven.


Butter, Shortening, or both?
So, here’s the rundown of the butter and shortening debate. Instead of either or, why not both? Butter allows the crust to rise, resulting in a flaky and delicious texture. But shortening keeps the dough pliable and holds its shape. Before I proceed, I need to clarify: I am not referring to Crisco, which is made from soybean oil, hydrogenated palm oil, and other things I can’t pronounce. Personally, I use Tropical Traditions Palm Shortening or Spectrum Organic vegetable shortening, which is made from non-hydrogenated palm oil. Truthfully, sometimes I just use butter. Because shortening is so forgiving and is WAY easier to roll out and mold, it is a great fat to start with or incorporate with the butter. Why not have the best of both worlds?
The texture is the most critical aspect of the crust. The trick is to keep the butter and/or shortening chilled so that when it bakes in the oven, the heat causes the water in the cold butter to release steam as it melts, creating those flaky pockets and a crispy crust. Blending it for too long will cause the fat to be incorporated into the flour prematurely, resulting in a dense texture. Flaky and light is the goal.
Mixing the cold butter and/or shortening into the flour mixture with a food processor will break it into tiny bits, which will quickly incorporate into the dough. Ultimately, the more you handle the dough, the warmer it will become. Blend until the fat is pea-sized or just until you can pinch some of the dough between your fingers, and it sticks together. You still want to see chunks of butter and/or shortening. Dump out onto a floured surface and try not to touch it too much. The fat needs to stay chilled, not warmed by your hands.
Perfect Pie Dough
Ingredients
- 2 1/2 cups all-purpose flour
- 1 tsp. salt
- 1 cup (16 T) fat- I use 1 stick (1/2 cup) butter and 8 T Spectrum Organic, non-hydrogenated vegetable shortening or Tropical Traditions Palm Shortening. Feel free to use all butter or all shortening as well. This is your preference.
- 1/2 cup ice water (measure out water first and then add the ice)
Instructions
This recipe yields two crusts. If you are making an apple or boysenberry pie, you would need a top and a bottom crust. For a savory quiche, pumpkin, or cream pie, you only need a bottom crust. Feel free to either freeze one crust for a later pie or quiche, or get really creative and use cookie cutters to cut out cute shapes, such as leaves, pumpkins, or a turkey, from the other dough to place on top of the pie. You can even do a lattice pattern for a cherry pie. Preparing two crusts at a time, regardless of the pie you are making, is the most efficient way to go.
Now, you can totally prepare this crust without a food processor, but if you have warm hands like me, the food processor is your best friend. I use my Cusinart processor ALL the time. Start by measuring out 1/2 cup of cold water in a glass measuring cup. Add ice to make 1 cup. You will still have 1/2 cup of water, only now it will be ice water. Measure the water first, then the ice. Set aside.
In the food processor, add the flour and salt and pulse to incorporate. Next, add your butter, shortening, or a combination of half butter and shortening. Pulse until the fat is pea-sized. Ultimately, you want to see flour with visible fat pockets.
Slowly add the ice water while gently pulsing until the dough starts to come together. Resist the urge to overprocess. Dump out onto a floured surface and form into a ball. Using a pastry cutter, divide the dough into two equal pieces. Flatten each piece into a round disk, wrap it in parchment paper, and refrigerate for at least 2 hours.
Refer to the individual pie or quiche recipe for instructions on how to bake the crust.
Process Pictures for Pie Crust in the Food Processor


Forming the Crust
This is the part that caused me to avoid pie baking for years. Either it would stick to the counter, or it would be too warm in my house, so it would fall apart. I watched numerous videos to identify where I was getting stuck. Sally’s Baking Addiction was an amazing resource. The woman is an expert pie maker and has numerous tutorials available that were so helpful.
Make sure you have a clean, well-floured surface. The goal is to create a 12″ circle so rolling and rotating the circle a 1/4 turn each time will keep it uniform. If it goes wonky, just put down the rolling pin and rein it in with your hands around the edges, forming it back into a circle. You will be trimming some of the edges off in places, so don’t worry about getting it perfect. Keep it thinish and uniform.


Transfer Crust to Pie Pan
With your rolling pin, carefully transfer the dough to the pie pan. Make sure the dough is well-floured and gently roll one end of the dough onto the rolling pin, rolling until all the dough is wrapped around the rolling pin. Slowly peel it off the counter to prevent it from breaking. Then, carefully unroll it over the pie pan, from one side to the other, making sure it is centered. Press it firmly into the pan and proceed to trim the edges, leaving a 1″ hangover all around.
Flute or Crimp?
At this point, decorate the edging to your preference. There is no right or wrong way to embellish your crust. As you can see from my pictures, I’ve changed what I do with each pie. Start by folding the edges over toward the pie and pressing them against the edge so they do not fall during baking. This will also seal in the pie filling. You can either crimp the edges with a fork or flute them using your fingers and a knuckle. Check out this video from Sally’s Baking Addiction on how to crimp or flute the edges.
Par Bake or Not to Bake…that is the Question
Since we are baking a pumpkin pie, we will partially bake (par-bake) the crust. Although this is not necessary, it does crisp up the bottom of the crust, making it less likely to be soggy. There are several essential steps that must be taken to ensure a successful pie. First, line the pie with a parchment sheet, crumpled in a ball and flattened back out to allow for easier molding in the pie pan. Second, you will need to fill the parchment-lined pie with a weight, such as pie weights or dry beans. Bake at 375° F for 15 minutes.
Remove the parchment and pie weights. Lightly baste the pie with a mixture of one egg and 1 T of milk or water (you will not use all of this). Fork holes in the bottom to allow the steam to escape. The water content in butter creates steam as it bakes, lifting the crust unless there is a way to escape. Place the pie shield around the edges to protect the crust from cooking too fast, and return it to the oven for an additional 8 minutes. Now your shell is ready for the filling.


Gather Ingredients and Prepare the Filling
Without a doubt, I like my filling on the spicy side. Be generous with your spices. Spoon them in. Not only will you benefit from the natural antioxidants, but the warming spices are also perfect for digestion after a big meal.
Pumpkin Pie filling is what this pie is all about. Personally, when I am feeling a little desperate for pumpkin pie but don’t have time to make a crust, I prepare what I call a pumpkin custard. Technically, that is what pumpkin pie filling is without the crust. Just bake the custard without the crust. Delicious. And if you are trying to cut carbs or stay away from gluten, then you don’t have to suffer from a lack of pumpkin pie for the holidays.

Not All Pumpkins Are For Baking
When I first met my husband, he came over to my house to help me make a pumpkin pie. He bragged that his mom made her pumpkin pies from real pumpkins. I had never heard of such a thing. As far as I knew in my early twenties, pumpkin came from a can. Not really, but I only ever used a can. So, we picked up an extra jack-o-lantern and tried to bake it.
Don’t do that.
Although my future husband bragged that his mother baked her pumpkin pie with actual pumpkins, he failed to know that there is a specific kind of pumpkin that one uses to bake said pie. Baking pumpkins —those cute little, round, and orange pumpkins you find at Trader Joe’s, marked “Baking Pumpkins” or “Sugar Pumpkins” — are what you use. Jack-o-lanterns are too tough and used for carving and displaying fun, lit faces in the fall. Needless to say, we didn’t make it very far with our pie that day, but we had a good laugh. We all have to start somewhere. You live and you learn.
Roasting the Pumpkins


Roasting pumpkins can be done way in advance to save time. Feel free to use a 16-ounce can of pumpkin, but roasting pumpkins is next level, super easy, and way more fulfilling. Plus, it fills your kitchen with the smell of fall. As soon as pumpkins start filling the produce section of your favorite market, purchase, roast, process, and freeze the puree for later use in pies, muffins, or Pumpkin & Butternut Soup. You can thank me later. There is a night-and-day difference between canned and scratch-roasted pumpkin. Don’t forget to save the pumpkin seeds and roast them as a nutritious snack.
*FYI-The picture to the right shows the difference between canned pumpkin and scratch-roasted pumpkins. The scratch pumpkin is bright orange and totally sweeter.
Why Cook the Pie Filling?
There are three reasons I started partially cooking the pie filling before baking it in the pie shell:
- Flavor development: When you cook pumpkin purée with the spices, it allows the flavors to meld together and deepen. It also cooks out that watery, raw pumpkin taste, leaving a rich flavor.
- Reducing Moisture: Pumpkin contains a lot of moisture, which can make your crust soggy. Cooking it a bit thickens the filling, resulting in a more consistent texture in the final pie.
- Smooth Texture: Cooking the filling for a few minutes allows the sugar to dissolve, leaving a smoother, silkier texture. Pumpkin pie filling is essentially a custard, so this extra step ensures an end product that is worth the extra step.


Pour, Protect, Bake, & Cool
Once the crust is partially baked, pour the prepared custard into the crust, 3/4 full. You could fill it to the top, but you risk it spilling over the edges while transferring it into the oven. Refer to the bottom-right picture for an example. If you have kiddos, there is always extra dough from trimming that you could allow them to make a mini pie in a ramekin and pour the extra filling in there. Otherwise, add any extra filling to a few ramekins and bake mini pumpkin custards.
Be sure and either place a pie shield around the edges of the pie to prevent the crust from baking faster than the filling. Alternatively, you could make a makeshift pie shield with foil. I use my shields often enough that they were worth the $15 investment for two.
Bake the pie at 375°F for 50-60 minutes, or until the filling is set. Depending on your oven, it is best to check frequently in the last 10 minutes. You are looking for cracks around the edges, but a slightly jiggly center. It will continue to cook as it cools and will crack if it cooks too long. Truthfully, it is not the end of the world if it cracks, but it is fun to learn to time it just right so you can say, “Look, Mom, no cracks.” I do this with my cheesecake, too. There are many Thanksgivings to perfect this one. I believe in you.
Cool for at least 2 hours on the counter. REFRIGERATE if not eating right away.


Pumpkin Pie
Ingredients
- 1 single Perfect Pie Dough (The recipe yields 2)
- For the pumpkin filling (can be made as a pumpkin custard on its own with no crust):
- 2 cups pumpkin puree ( from a fresh baking pumpkin or 16 oz can)
- 1 cup natual brown sugar, I use Panela Organic Unrefined Cane Sugar
- 1 & 1/2 T Pumpkin Pie Spice or (2 tsp. ground ginger, 2 tsp. ground cinnamon, 1 tsp. fresh grated nutmeg, 1/4 tsp. ground cloves, & 1/8 tsp. ground black pepper).
- 1/2 tsp. sea salt
- 2/3 cup heavy cream
- 2/3 cup whole milk
- 4 large eggs, lightly beaten
- For the whipped cream:
- 1 & 1/3 cup heavy cream
- 2 T pure maple syrup
- 1 tsp pure vailla extract
Instructions
Preparing the pumpkin puree from scratch is easy and well worth the extra effort. Baked pumpkins are sweet and creamy. Preheat the oven to 400°. Cut the pumpkin in half and scrape out all the seeds (to roast later). Roast cut-side down on a parchment-lined cookie sheet with 2 T water for about 45 minutes. Allow to cool. Scoop out the pumpkin flesh into a food processor and process until creamy. Be sure to remove all seeds before processing.
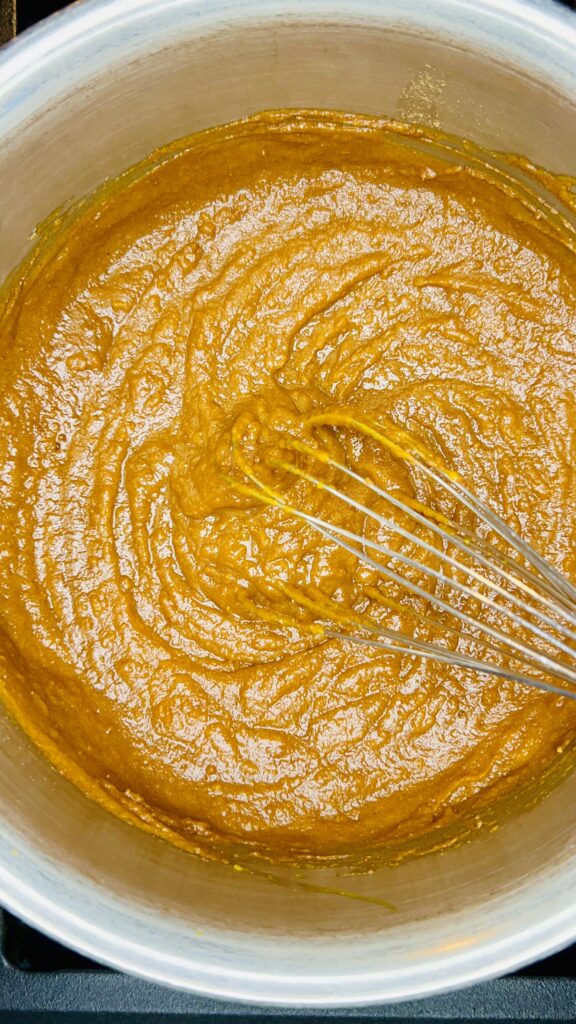
To prepare the pumpkin pie filling, add 2 cups of puree to a saucepan along with the sugar, spices, and salt. Cook over medium heat until the mixture thickens slightly, about 5 minutes. Whisk in the milk and cream and simmer until incorporated. Remove from the heat, allow to cool a bit, and add the lightly beaten eggs. Mix thoroughly with a whisk.
In a par-baked, prepared crust, pour in the filling and bake on the lowest rack in the oven until the edges are lightly cracked but the center still jiggles slightly, about 50-60 minutes at 375°F. Check for doneness every 5 minutes during the last 10 minutes, as oven temperatures vary. To protect the crust from browning too quickly, I recommend placing a pie shield around the edges.
When the pie is finished, allow it to cool for at least two hours before slicing. Serve with Maple Whipped Cream sprinkled with a dusting of pumpkin pie spice.
To prepare Maple Whipped Cream: There is no need to buy canned whipped cream when making your own is so easy, tastes way better, and you can control the ingredients. Whip the cream alone either in a standing mixer with the whisk attachment, in a bowl with a hand mixer, or the old-fashioned way —using a whisk and a little muscle. Whip until peaks begin forming. Then add the vanilla and maple syrup and whisk until incorporated, and the peaks can stand alone. Be careful not to whip too long. Otherwise, you will have maple butter.
Ta-Da…Pumpkin Pie
See, mine cracked. Covering the cracks with pumpkins I made from the extra dough was my way of distracting anyone from noticing. They see the pumpkins and don’t even mention the cracks. It still tasted amazing. Serve pie at room temperature with a dollop of maple whipped cream and a dusting of pumpkin pie spice. EnJOY!


Pin for Later

Shop This Post
Pie Crust Protector Shields (2 pack)
Marble Rolling Pin -This is a bit heavy, but the marble stays chilled, so it doesn’t warm the dough.
Anchor Hocking 9.5-inch Deep Glass Pie Plate -glass conducts heat the best.
Unbleached Parchment Paper Sheets (200 Count)
2 cup Glass Measuring Cup with Handle
Cuisinart Food Processor, 14-cup (one of the most used apliances in my home)
Tropical Traditions Glyphosate-Tested Palm Shortening (This comes in a one-gallon bucket and is a healthy, non-hydrogenated, trans-fat-free fat for frying and baking) or Spectrum Organic, non-hydrogenated vegetable shortening (you can purchase it at Whole Foods)
Check Out These Other Related Posts


In everything you do -eat, play, and love- may it always be Seasoned with Joy!
This post contains affiliate links, which means I make a small commission at no extra cost to you. Unless stated otherwise, I will only recommend products I personally enJOY. See my full disclosure here.